layout: post
title: ArangoDB安装,For Centos7[原创]
categories: ArangoDB
description: 笔记
keywords: ArangoDB,linxu,centos
ArangoDB安装,以及访问出现无权限,导致无法连接arangosh,的解决方法。
ArangoDB安装
date:2017-08-17
author:zhangjianxin
[TOC]
1.下载ArangoDB rpm
wget http://112firshme11224.test.upcdn.net/blog/arangodb3-3.2.0-1.x86_64.rpm
2.Install ArangoDB
rpm -ivh arangodb3-3.2.0-1.x86_64.rpm
3.start
systemctl start arangodb3
4.status
systemctl status arangodb3
5.配置arangosh
/etc/arangodb3/arangosh.conf
----------------------------------------------
[console]
pretty-print = true

[server]
endpoint = tcp://127.0.0.1:8529
authentication = true
# username = root
# password =

[log]
file = -

[javascript]
startup-directory = /usr/share/arangodb3/js
6.配置arangod
# ArangoDB configuration file
#
# Documentation:
# https://docs.arangodb.com/Manual/Administration/Configuration/
#

[database]
directory = /var/lib/arangodb3

# maximal-journal-size = 33554432

[server]
# Specify the endpoint for HTTP requests by clients.
#  tcp://ipv4-address:port
#  tcp://[ipv6-address]:port
#  ssl://ipv4-address:port
#  ssl://[ipv6-address]:port
#  unix:///path/to/socket
#
# Examples:
#   endpoint = tcp://0.0.0.0:8529
#   endpoint = tcp://127.0.0.1:8529
#   endpoint = tcp://localhost:8529
#   endpoint = tcp://myserver.arangodb.com:8529
#   endpoint = tcp://[::]:8529
#   endpoint = tcp://[fe80::21a:5df1:aede:98cf]:8529
#
endpoint = tcp://[::]:8529
storage-engine = auto

# reuse a port on restart or wait until it is freed by the operating system
# reuse-address = false

authentication = true

# number of server threads. use 0 to make arangod determine the
# number of threads automatically, based on available CPUs
# threads = 0

# gather server statistics
statistics = true

# the user and group are normally set in the start script
# uid = arangodb
# gid = arangodb

uid = arangodb


[scheduler]
# number of threads used for I/O, use 0 to make arangod determine
# the number of threads automatically
# threads = 0

[javascript]
startup-directory = /usr/share/arangodb3/js
app-path = /var/lib/arangodb3-apps
# app-path = //arangodb3/apps

# number of V8 contexts available for JavaScript execution. use 0 to
# make arangod determine the number of contexts automatically.
# v8-contexts = 0

[foxx]
# enable Foxx queues in the server
# queues = true

# interval (seconds) to use for polling jobs in Foxx queues
# queues-poll-interval = 1

[log]
level = info
file = /var/log/arangodb3/arangod.log

[cluster]

[rocksdb]
# encryption-keyfile=/your-encryption-file
以上完成安装
7.访问测试
arangosh
# 进入arangodb bash

8.解决没有权限问题
 # 停止 `systemctl stop arangodb3`
 # 不启用授权启动arangodb
/usr/sbin/arangod --server.authentication false
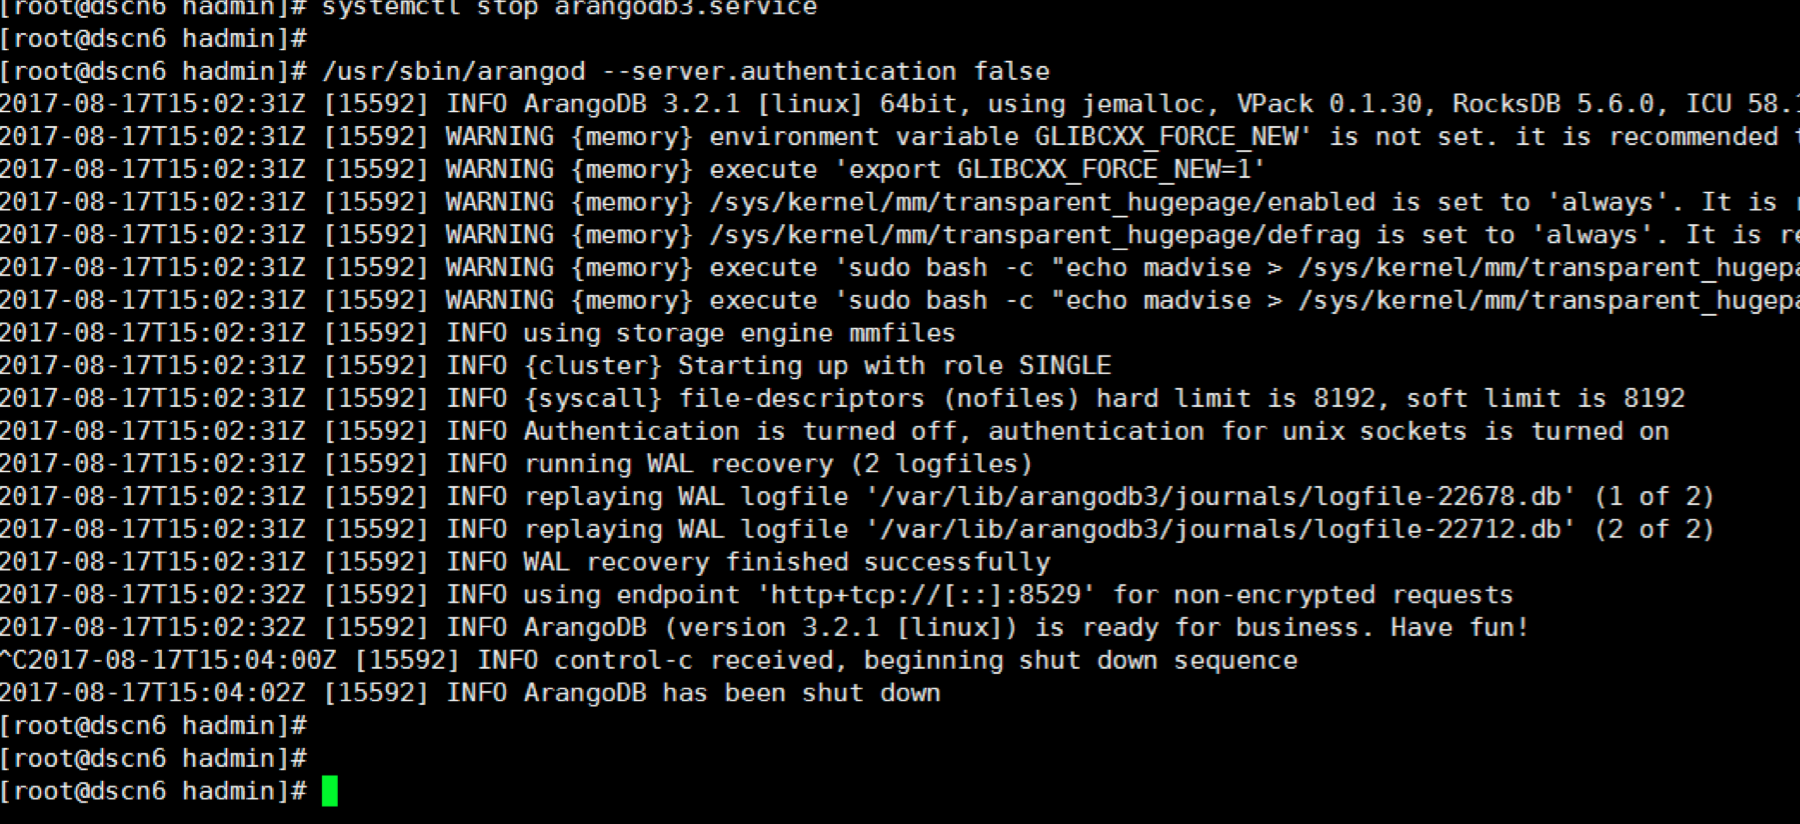
* 注意启动以后开启另一个shell窗口,当前的不要结束,图上面是已经Control + C了,这一步在什么时候做下面会说。
* 接下来执行arangosh 它会让你输入密码,直接会车即可。
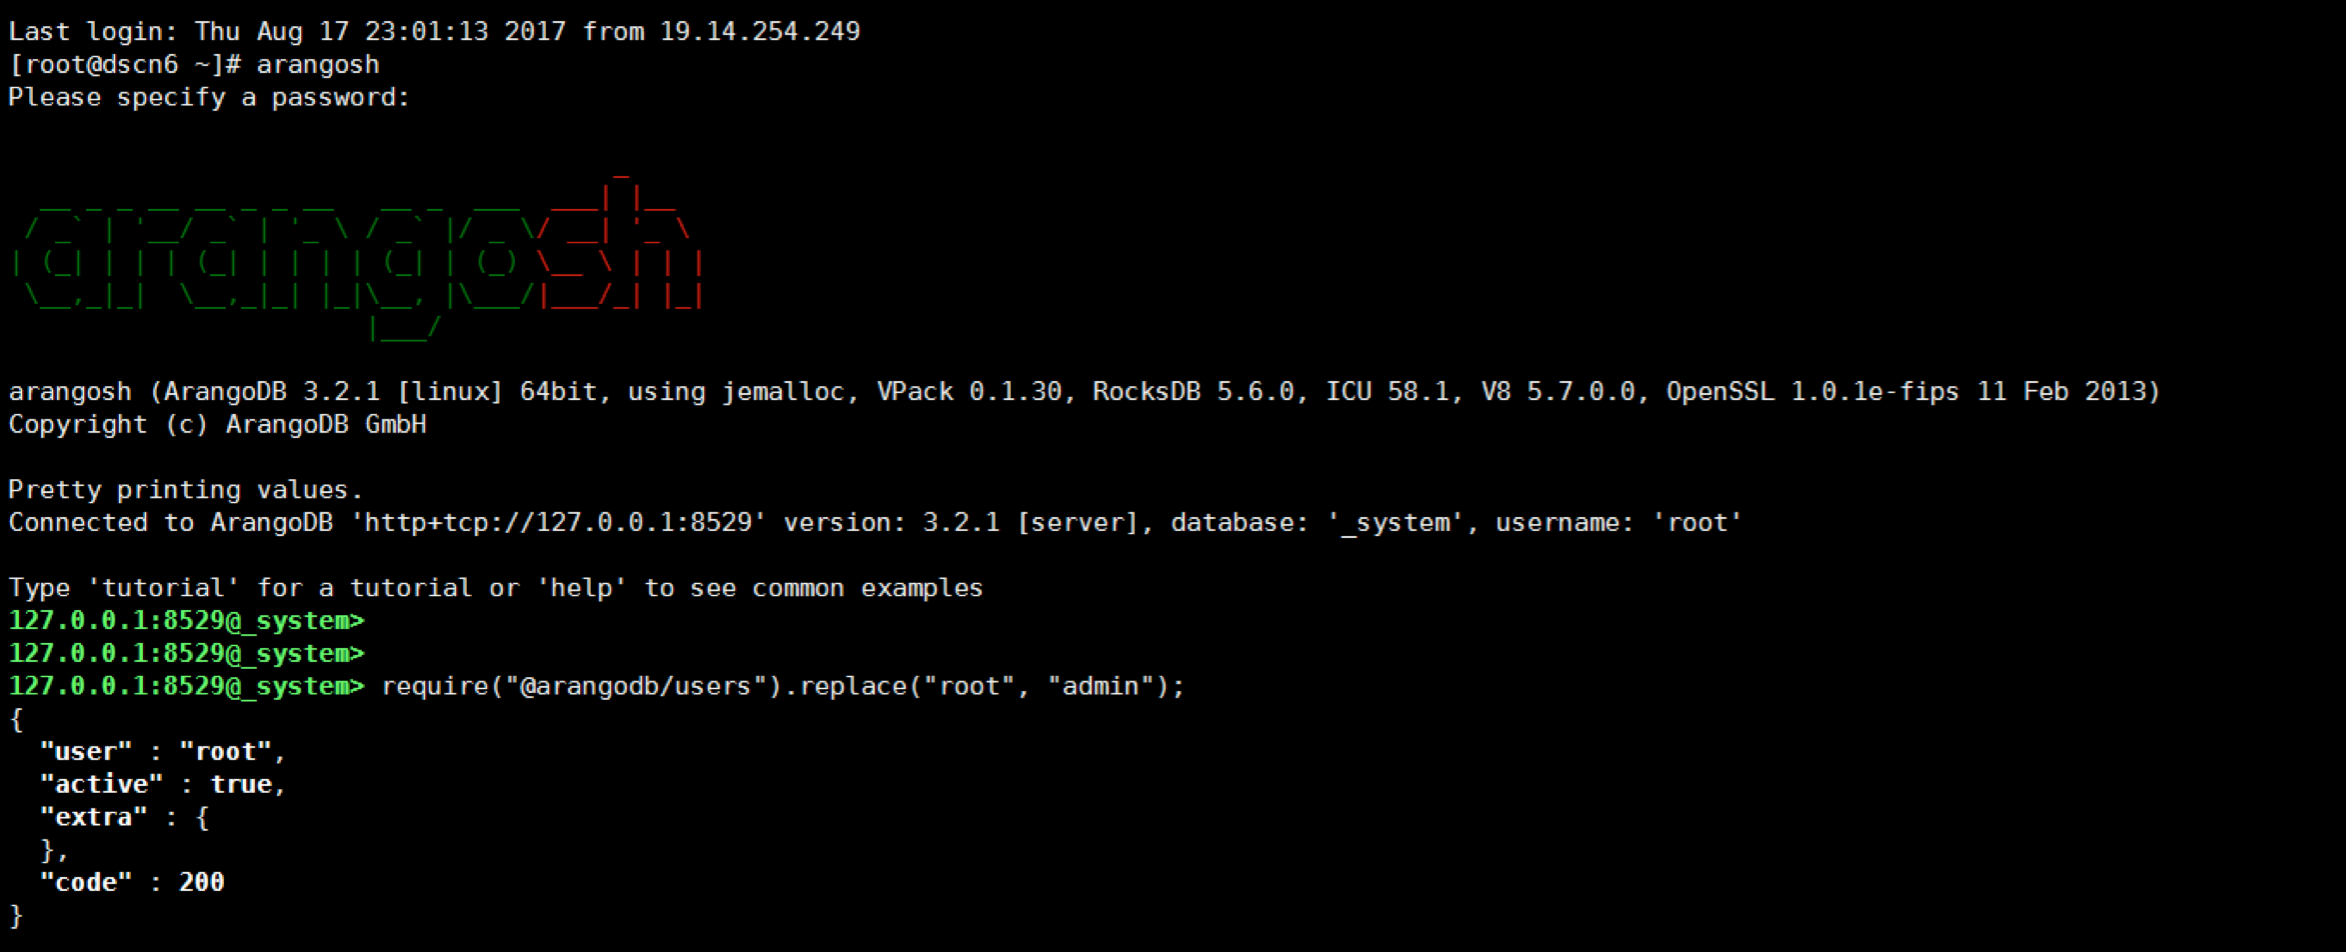
- 在出现的arangodb shell 里面执行如下命令。
require("@arangodb/users").replace("root", "new-password");
#通过他的客户端进行直接修改`root`密码
- 输入完密码,进行退出
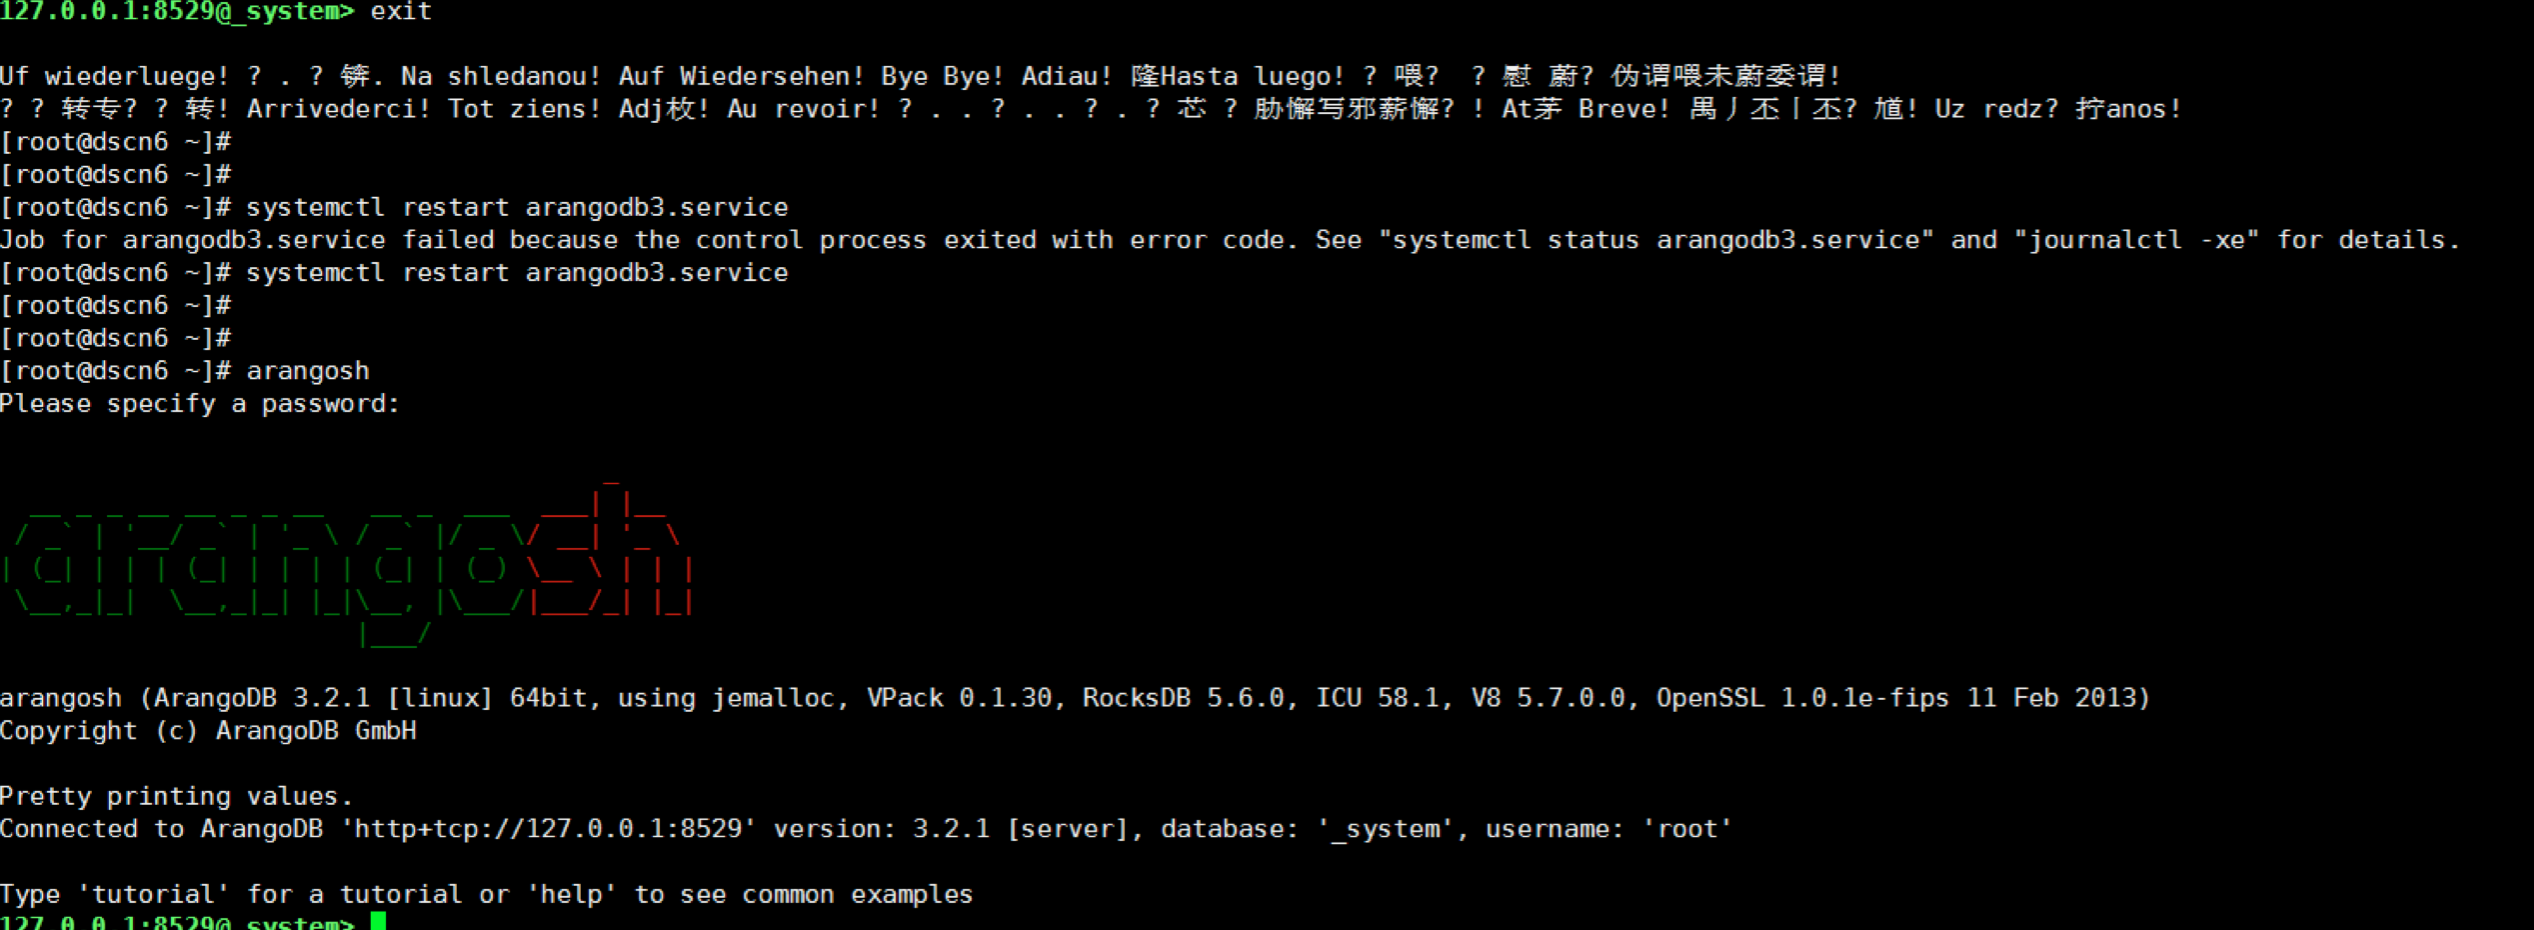
exit
- 退出后去第一个shell窗口执行
Control + C。
- 然后在任意shell窗口进行访问
arangosh,并且输入修改后的密码,即可成功登录arangodb。
不推荐使用arango-secure-installation进行修改root密码。
- 以上操作经过验证可以直接拿去。
- Owner
breakEval13
- https://github.com/breakEval13